Tuesday, February 4, 2020

Winging It

 We eat vegetarian meals fairly frequently, but we are not vegetarians. If I want wings, I'll eat chicken wings. So I didn't decide to try a recipe for Baked Buffalo Cauliflower Wings because I was looking for faux wings or healthier wings or vegetarian wings. I decided to try them because we really like cauliflower, especially roasted cauliflower, and it looked like a preparation with a lot of flavor.

The flavor was good, really spicy, which we like, but, overall, I wasn't pleased with the recipe. The main problem was that the batter was too thin and fell off the wings during baking, which made the presentation less than the best. Here it is:


If I decided to make a version of this dish again, I'd make some modifications.

If I wanted battered cauliflower, I'd choose a different basic batter recipe, and I'd deep fry the florets instead of baking them. We don't eat fried foods very often, so I have no problem with the occasional deep-fried item, properly drained. After draining, I'd toss the florets in the hot sauce and serve.

I'm not sure battering and frying is necessary. I also think it'd be good to toss the florets in olive oil and the spices called for in this recipe (garlic powder, cumin, paprika, salt, and pepper) and roast them at 400 degrees for 15-20 minutes on an oiled baking sheet. I'd remove them, toss them in the hot sauce, and return them to the oven for another 10 minutes.

My Tip: The trick to roasted cauliflower is to cut the florets in such a way as to create as many flat surfaces as possible. It's the contact of the flat floret surface and the hot pan that creates a nice golden roast.

Here's the recipe in case you want to give it a try. At the bottom, I've added a couple of my notes on the preparation. I'll update you if I try either or both of the modifications I've outlined above. We love cauliflower, and we liked the spicy flavor of these, just not the consistency of the batter.

Baked Buffalo Cauliflower Wings
(From Gimme Delicious)

1 head of cauliflower 
1/2 c. water
1/2 c. milk 
3/4 c. all-purpose flour 
2 tsp. garlic powder 
1 tsp. cumin 
1 tsp. paprika
1/4 tsp. salt
1/4 tsp. ground pepper
1 c. Frank's red hot sauce
1 T. butter 

Line baking sheet with parchment paper.  Preheat oven to 400-425 F depending on your oven.
Wash and cut cauliflower head into bite-sized pieces/florets.
Mix the milk/water/flour and spices in a medium mixing bowl. Mix until the batter is thick and is able to coat the cauliflower without dripping. Dip the cauliflower in the batter. Shake off excess batter before placing cauliflower on the baking sheet. Lay the cauliflower single layer on the baking sheet. Bake for 20 minutes until golden brown, flipping the florets over halfway through to get all sides golden brown and crispy.
In a small saucepan over low heat, melt butter and mix in hot sauce. Remove from the heat just as it starts to melt. Stir together and set aside.
Remove cauliflower from oven and put into a mixing bowl with the wing sauce and toss to coat evenly. Return cauliflower to baking sheet and bake in the oven for another 10-15 minutes or until desired crispness. Serve with celery sticks and blue cheese dressing. 

Notes: I added one-fourth cup additional flour to the batter, and it was still too thin. I used bottled Ken’s Blue Cheese Dressing thinned with white wine vinegar until I got the consistency I wanted. The vinegar gave it a nice tang.


Sunday, January 26, 2020

Can You Trust a Marinara in January?

I based the title of this week's blog on one of my favorite books, an oldie but goodie by Vince Staten called "Can You Trust a Tomato in January? The Hidden Life of Groceries Revealed At Last." The book's out of print, but you can still find it.


Meeting Vince Staten is on my bucket list. Among his claims to fame, besides writing numerous illuminating and witty books, are that he's the guy who ran for Homecoming Queen at UT in the 70's wearing a paper bag over his head--and won. You can google it.

Anyway, you cannot trust a "fresh" tomato in January--at least not in Knoxville.  Our local tomatoes are trustworthy & tasty only in summer and early fall. Don't get me started on the offensive, gassed-up tomatoes trucked in from somewhere else. They might look like tomatoes, but they don't taste like them.

So, if it's January, and you need marinara, what's your best bet? Making your own with good quality canned tomatoes? Or buying a commercially-prepared sauce in a jar?

We did a sauce-off in our kitchen to settle this question once & for all. For our taste test, I put the two sauces in ramekins and served them with saltines.


Our test revealed that it is better to make a simple, homemade sauce (the one on the left) with good quality canned San Marzano tomatoes than to buy sauce in a jar, even a well-known, expensive brand like Rao's, which is the one I chose for the test. If you are a fan of another commercially-prepared sauce, call me to set up a sauce-off.

For the homemade sauce, I looked at a lot of marinara recipes & ended up selecting one of the simplest ones--from NYT Cooking--The New York Times.  I made only a couple of tweaks, one out of necessity.

It's a versatile sauce. Tonight I used it in a simple, hearty dish--Baked Chicken Parmesan--but you can use it in anything calling for a simple red sauce.


Below you'll find the recipes for the marinara sauce and the Baked Chicken Parmesan. Let me know what you think of the marinara. What do you do? Do you have a better winter sauce?

THE RECIPES

Winter Marinara Sauce

1 28-oz. can whole San Marzano tomatoes
¼ c. extra-virgin olive oil
7 garlic cloves, peeled and slivered
Pinch crushed red pepper flakes
1 tsp. kosher salt
1 large fresh basil sprig, or 1/4 teaspoon dried oregano, more to taste

Note: I used basil AND dried oregano. I couldn’t find fresh basil last week, so I used a couple of squirts from a tube. I also added a slice of Parmesan rind cut from the chunk pictured below. The basil in a tube gave the closest approximation to fresh. I wouldn't add dried basil to this sauce. I read about the Parmesan rind in a different recipe & think it was a nice touch. I did not add sugar, which a lot of recipes called for.


Pour tomatoes into a large bowl and crush with your hands. Pour 1 cup water into can and slosh it around to get tomato juices. Reserve. In a large skillet (do not use a deep pot) over medium heat, heat the oil. When it is hot, add garlic. As soon as garlic is sizzling (do not let it brown), add the tomatoes, then the reserved tomato water. Add red pepper flakes, oregano and salt. Stir.
Place basil sprig, including stem, on the surface (like a flower). Let it wilt, then submerge in sauce. Simmer sauce until thickened and oil on surface is a deep orange, about 15 minutes. If using oregano, taste sauce after 10 minutes of simmering, adding more salt and oregano as needed. Discard basil, if using fresh. 

Quick Baked Chicken Parmesan


4 skinless, boneless chicken breast halves
Salt and freshly ground black pepper to taste
2 eggs
1 c panko bread crumbs
½ c. grated Parmesan cheese 
2 T.  all-purpose flour 
olive oil for frying 
½ c. or more Marinara sauce, depending on how saucy you like it
½  c. shredded Mozzarella
¼ c. coarsely grated Parmesan cheese

Preheat oven to 450 degrees  Place chicken breasts between two sheets of heavy plastic and pound with smooth side of  meat mallet to a thickness of 1/2-inch. Slice in half lengthwise. Season with salt and pepper. Beat eggs in a shallow bowl and set aside. Mix bread crumbs and 1/2 cup Parmesan cheese in a separate bowl. Place flour in a sifter or strainer; sprinkle over chicken breasts, evenly coating both sides. Dip flour-coated chicken breast in beaten eggs. Transfer breast to bread crumb mixture, pressing the crumbs into both sides. Repeat for each breast. Set aside breaded chicken breasts for about 15 minutes.
Heat olive oil in a large skillet on medium-high heat. Cook chicken until golden, about 2 minutes on each side. Place chicken pieces in a baking dish and top with marinara sauce. Top with Mozzarella  and then Parmesan. Bake until cheese is browned and bubbly, 20 minutes or more. Serve with a side of angel hair pasta & marinara sauce.


Monday, January 20, 2020

Mojo Redo

A couple of weeks ago I cooked one of our favorite dinners, Cuban Pork Chops with Frijoles Negros and Mojo Sauce, thinking it'd be a good one for the blog.  Dinner was delicious, but I wasn't pleased with the photos. Time for a Redo!

The timing of the redo was great because Alan Carmichael was able to join us while his wife Cynthia Moxley was out of town and give his feedback. Spoiler: He liked them!

With this recipe, my secret is using a sous vide. What's that, some of you may be asking?

Read about it here.

https://anovaculinary.com/

I recently discovered my friend, Joseph Lenn, chef/owner at JC Holdway, pictured below at his restaurant, also has a sous vide and finds his helpful.


"I don't have to babysit it," he said. "I like it because it's great for cooking tougher cuts, such as pork neck. My favorite is a thick cut bone-in pork chop because the meat cooks evenly. It's also a good way to infuse flavors."

A sous vide will give you both precision and flexibility. The guides tell you precisely the water temperature you want & how long it should remain at that temperature. It's a holding device. A water bath.

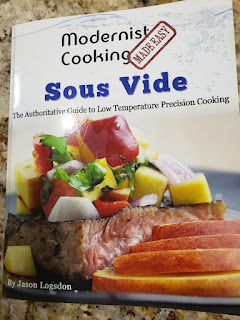
I found a book that not only has some good recipes but has basic sous vide cooking guides: i.e. what temperature for how many hours to cook what item.


Back to Mojo! One of our favorites is Cuban Pork Chops with Frijoles Negros and Mojo Sauce, which came from the cookbook pictured above. I like to serve it with saffron rice.


The rub and mojo sauce would complement pork chops cooked any way, not just using a sous vide, but I do like using the sous vide for this recipe. The saffron rice was a grocery store brand. I forget which one. You can take the chops out of the water bath and toss them into the refrigerator for a day or two before searing.

Searing the pork chops and cooking the beans and rice takes almost no time and makes a great quick dinner, but I have also dressed it up and served it at dinner parties.

I hope you'll try this and let me know what you think.


THE RECIPE

Cuban Pork Chops with Frijoles Negros and Mojo Sauce

For the Pork Chops
Salt & pepper
1-2 pounds boneless pork chops
1 T. garlic powder
1 T. ground cumin
2 tsp. ground oregano
2 tsp. onion powder
I don't keep onion powder on hand, so I increased the amounts of the other three

Using your sous vide, heat a water bath to 140. Mix together the spices in a bowl. Salt and pepper the pork and then coat it with the spices. Place the pork chops in a gallon-size zip lock bag, with as much air squeezed out as possible, and seal. Place the bag in the water. Cook the pork for 2-3 hours.

For the Mojo Sauce
3 T. olive oil
8 garlic cloves, minced
1/3 c. orange juice
1/3 c. lime juice
1 tsp. ground cumin
1 T. chopped oregano
Salt and pepper

Heat the olive oil and garlic in a pan over medium-high heat. Cook until garlic begins to soften, about one minute, then add orange juice, lime juice, and cumin. Bring to a simmer, stir in the oregano, salt, and pepper, and remove from heat.

For the Frijoles Negroes
Olive oil
1 medium onion, diced
1 green pepper, diced
4 garlic cloves, minced
2 c. cooked black beans
1 T. dried oregano
1 tsp. ground cumin
salt and pepper

Heat the oil over medium to medium-high heat. Add onion and green pepper and cook until softened. Add garlic and cook for one minute. Add beans, oregano, and cumin and cook for 10 minutes. Salt and pepper to taste. Keep warm until ready to serve.
For easier bean prep, omit the onion, green peppers, and garlic and simply add some orange juice, oregano, cumin, salt and pepper to drained, canned black beans.

To Assemble
Take pork out of bag and pat dry. Heat iron skillet with a tiny amount of oil. Place chops in skillet. Brush mojo sauce on side facing up and flip the chops. Repeat a few times, until chops are fully coated, cooking 30-45 seconds per turn. Remove from heat. They're already cooked to perfection; you just need to sear them.

To Serve
Place cooked rice (any kind) on plate. Add beans and pork chops. Serve with additional mojo sauce on the side.


Tuesday, January 14, 2020

Instant Pot Love?

We bought an Instant Pot a year or so ago.

Can we agree it's just a fancy pressure cooker? You can saute and do all kinds of handy things to create a one-pot meal with pressure involved at some point, but mainly it's a pressure cooker. And therein lies the problem for me.

Pressure cookers and I do not have a happy history.

I remember my mother using a pressure cooker in the 1950s and 60s, one of those old timey ones with the wiggly thing on top and steamy pressure escaping, complete with scary whistling sound effects, but I'd never used one myself until one day in the mid 1980's when I borrowed my friend Susan's pressure cooker to cook some beets. Why a pressure cooker? Why beets? I wish I remembered.

What is memorable is that partway through the process the wiggly thing came undone and the whole thing exploded, turning my white kitchen into something worthy of yellow crime scene tape.

That, my friends, was my last foray into the world of pressure cooking--until we bought the Instant Pot. Since purchasing it, I've made a couple of decent pot roast dinners without unleashing the steaming hot furies. They turned out OK, but mostly the pot sits on a closet shelf, daring me to take it on, so I recently looked through my two Instant Pot cookbooks, selected a recipe for Thai Cashew Chicken from "Instant Pot Obsession," and set about producing something other than pot roast.

Here's the result.


It was good, but I'm not sure I couldn't produce something as good using my wok.

So, Instant Pots? For me, the jury's still out. Do you have one? Do you love it? How do you use it?

Thai Cashew Chicken

1/4 c. all purpose flour
1 tsp. kosher salt
1 lb. boneless, skinless chicken thighs
3 T. vegetable oil
1/2 c. chicken stock
2 T. soy sauce
1 T. fish sauce
1 T. freshly squeezed lime juice
2 tsp. sugar
1 tsp. red pepper flakes (or more!)
1/2 small onion, sliced thin
1 small red bell pepper, seeded, cut into 1-inch pieces
1 medium jalapeno, seeded, cut into thin half-moons
2 tsp. cornstarch
1 T. water
1 c. roasted unsalted cashews (I used salted because it's what I had)

Mix flour and salt in shallow dish. Dredge thighs in flour, lightly coating both sides. Shake off excess. Preheat Instant Pot by selecting Saute and adjust to More for high heat. Heat the oil until it shimmers. Add chicken in single layer. Cook in batches if needed. Let cook undisturbed until golden brown, 4-5 minutes. Flip thighs and cook until browned on the other side, 3-4 minutes. Transfer thighs to plate to cool and then cut into bite-size pieces.
While the chicken cools, pour any accumulated fat out of the pot. While the pot is still hot, pour in the chicken stock and stir, scraping up any browned bits from the bottom. Simmer the stock until it reduces by half. Add soy sauce, fish sauce, lime juice, sugar, and red pepper flakes to the pot and stir to continue.
Add the cut-up chicken, onion, bell pepper, and jalapeno to the pot. Lock the lid into place. Select Manual. Adjust the pressure to High and the time to 5 minutes. After cooking, naturally release the pressure for 5 minutes, then quick release any remaining pressure. Unlock and remove the lid.
In a small bowl, whisk together the cornstarch and water until mixture is smooth. Stir this into the sauce and cook until the sauce thickens, 2-3 minutes. Taste and adjust seasoning. Add cashews and mix gently. Serve.


Wednesday, January 1, 2020

A Souper Start to 2020

Happy New Year, Friends.

It's been a while since I posted anything on the blog--almost four years. My last post was titled "Why Should Potatoes Have all the Fun?" I had no idea what that title meant until I re-read it just now. The topic was Fennel Fries. You can read about it here:

http://gaylyons.blogspot.com/2016/03/why-should-potatoes-have-all-fun.html

Today's topic--perfect for a January day--is soup: An old favorite and a new one that is not a keeper.

For a laid back New Year's Eve at home with a few friends, I made tomato soup and white chicken chili.

Easy Tomato Soup and Grilled Cheese Croutons, from "Barefoot Contessa: Foolproof," is as easy as its name promises. The grilled cheese croutons are fun, but you can also just serve grilled cheese sandwiches on the side.


I decided to make white chicken chili because I've never had a recipe that satisfies me. It seemed like a good time to try out another one with friends as taste testers. Everyone gave it a thumbs up, but I'm not satisfied with it. The tri-colored tortilla strips dressed it up, but to me, it's just missing something. Maybe it has too much cheese and sour cream diluting the flavor?


Do you have a good recipe for white chicken chili? If you do, I hope you'll share it with me.

Meanwhile, scroll down for the recipe for Easy Tomato Soup and Grilled Cheese Croutons, which I highly recommend, and the recipe for White Chicken Chili, which has me searching for a better one.

Until next time...

G.

THE RECIPES

Easy Tomato Soup with Grilled Cheese Croutons


3 T. good olive oil
3 c. yellow onions, chopped 
1 T. minced garlic (3 cloves)
4 c. chicken stock
1 (28-ounce) can crushed tomatoes
Large pinch of saffron threads
1 T. Kosher salt 
1 tsp. freshly ground black pepper
1/2 c. orzo
1/2 c. heavy cream


In a large pot, heat the olive oil over medium heat. Add the onions and cook over medium-low
heat for 15 minutes, stirring occasionally, until golden brown. Add the garlic and cook for one
more minute. Stir in the chicken stock, tomatoes, saffron, salt, and pepper. Bring the soup to a
boil, then lower the heat and simmer for 15 minutes. Meanwhile, fill a medium pot with water, add
two teaspoons salt, and bring to a boil. Add the orzo and cook for seven minutes. Drain the orzo
and add it to the soup. Stir in the cream, return the soup to a simmer, and cook for 10 more
minutes, stirring frequently. Serve hot with Grilled Cheese Croutons scattered on top. You can use
the method below or make them using your favorite technique.


Grilled Cheese Croutons 


4 (½-inch-thick) slices country white bread
2 T. unsalted butter, melted
4 oz. Gruyère cheese, grated

Heat a panini grill. Place the four slices of bread on a cutting board and brush lightly with the
melted butter, being sure to butter the corners. Turn the slices over and pile Gruyère on two of the
slices. Place the remaining two slices of bread on top of the Gruyère, buttered sides up.
Grill the sandwiches on the panini grill for about 5 minutes, until nicely browned. Place on a
cutting board, allow to rest for 1 minute, and cut into 1-inch cubes.

Note: A grilled cheese sandwich is the first thing I remember learning to cook--at age 9. I
still make these the way my father taught me. I use sliced sharp cheddar and “grill” the
sandwiches in a frying pan, adding lots of butter as needed.

White Chicken Chili

3 lbs. boneless skinless chicken breast halves
3 T. olive oil divided
2 T. plus 2 tsp. chili powder, divided
3 T. cumin, divided
1 tsp. salt, divided, plus more, to taste
1/2 tsp. cayenne pepper or to taste
3 c. chopped onion 
3 T. minced garlic or more if you love garlic 
3 15-ounce cans white beans, drained
2 4-ounce cans chopped green chiles (hot or mild, depending on your preference)
2 tsp. oregano
4–6 c. chicken broth
3 c. shredded cheese (half Monterey Jack, half cheddar)
1 cup sour cream, divided

Preheat the oven to 350ºF. Spread chicken out in a roasting pan. Drizzle with one tablespoon
olive oil and season with two teaspoons chili powder, one tablespoon cumin, 1/2 teaspoon salt
and a pinch or two of cayenne. Roast for 30 minutes. Shred or cut into bite sized pieces. Set
aside.
In a large pot, heat remaining two tablespoons olive oil. Sauté onion and garlic over medium
heat for five minutes or so, until tender. Add beans, shredded chicken, chilies, oregano, two
tablespoons chili powder, two tablespoons cumin, 1/2 teaspoon salt, and 1/4 teaspoon cayenne
(or more, to taste). Add four cups of chicken broth, reserving the rest for thinning the chili to your
desired consistency. Stir to combine and simmer gently on low for 20 minutes. To keep the
chicken tender, do not let the pot boil. Remove the pot from the heat and let it cool for five
minutes or so before proceeding. With the pot still off the heat, stir three cups of cheese into
the pot, 1 cup at a time. Then stir in one cup of sour cream. Bring the pot back to a gentle
simmer over low heat. To keep the dairy products from separating, don’t boil. Simmer the chili
for 15-20 minutes, adjusting with additional chicken broth as needed.

Note: I can’t remember where I found this recipe.


Sunday, March 27, 2016

Why Should Potatoes Have All the Fun?

I've roasted fennel before--but always as part of a roasted root vegetable platter. Tonight, with a fennel bulb on hand & no particular plans for it, I decided to give it a try as a solo performer.

Peheat oven to 400. Slice fennel bulb in half lengthwise. Then slice into 1/2 inch strips. Include core. Toss with 1/8 c. olive oil, salt, & pepper. Roast for an hour, tossing pieces every 15 minutes.

They were great. We ate every bite & almost fought over the last few.


Fennel Fries--that's what we're having.

NOTE: I adapted these from Barefoot Contessa's recipe. I think the parmesan cheese would be a good addition, but it is not necessary.

Roasted Fennel with Parmesan

Saturday, August 16, 2014

Curry in a Hurry

Sometimes you just need to cheat a little. 

I was having such a relaxing afternoon reading "Cook's Illustrated" & "Vanity Fair"  that I didn't start dinner prep quite as early as I should have, so I turned to one of my reliable cheaters: Trader Joe's Thai Yellow Curry Sauce. I usually keep a bottle of it & the Red Thai Curry Sauce in the pantry. 

The technique is simple: steam or saute your ingredients until just tender & then put them together for a brief communal simmer in the sauce. My ingredients tonight: carrots, green beans, mushrooms, onions, and tofu. Don't pre-cook the mushrooms. 

I pressed the excess water out of the tofu by putting it between two layers of paper towels topped with my favorite "presser": a cast iron skillet.


The next step is "dry frying" slices of pressed tofu in the same skillet. 


Slice the browned tofu, & it's ready to go.


You can use chicken or other meat or shrimp--I just really like the veggie version, & I pretty much always have a package of extra firm tofu on hand.

Shortly before serving, I put the vegetables (except for the uncooked mushrooms) into a skillet with the curry sauce & simmered briefly. Then I added the tofu and mushrooms and simmered it bit longer.


With the curry on a low simmer, I decided to see how well zucchini noodles (this summer's obsession) paired with Indian spices. While the salted noodles rested in the colander (to remove moisture), I made a quick tomato sauce which I seasoned with a bit of chaat masala, an Indian spice blend & then tossed it with the zucchini noodles.


The zucchini noodles went great with the curry. 


Curry with French wine (a gift from my friend Marilyn Kallet)? 


Mais oui certainment! 

That's what we're having.